
Photo of a young woman enjoying coffee with her laptop
The modular architecture of NopCommerce enables the smooth integration of plugins that can be used to enhance or add additional capabilities without changing the original source code.
The nopCommerce team and various nopCommerce sellers offer a wide variety of plugins in the nopCommerce marketplace.
The following tutorial was created with Visual Studio 2022 and nopCommerce 4.60.
Deciphering the Plugin Structure
The \Plugins directory in your nopCommerce application folder is where all plugin projects with source code should be. It’s advised to name your plugin project in the format of Nop.Plugin.{Group}.{Name}.
The compiled plugin is housed in the \Presentation\Nop.Web\Plugins directory, which is where nopCommerce seeks out plugins to load into its application during runtime.
Every plugin is expected to have a plugin.json file in its directory. The nopCommerce application uses this file to verify plugin compatibility with the current nopCommerce version and to fetch other plugin-related details that are used in different areas of the application by nopCommerce.
Additionally, a logo.jpg file can be included with the plugin to display an image of the plugin wherever necessary.
For both, plugin.json and logo.jpg files, ensure they are marked as Content for Build Action file property and Copy always property is set to Copy to Output Directory within your Visual Studio plugin project.
Building a Basic nopCommerce 4.60 Plugin:
Step 1
Download and access the nopCommerce 4.60 source code and double click on the NopCommerce.sln file to launch the NopCommerce project in Visual Studio.

Step 2
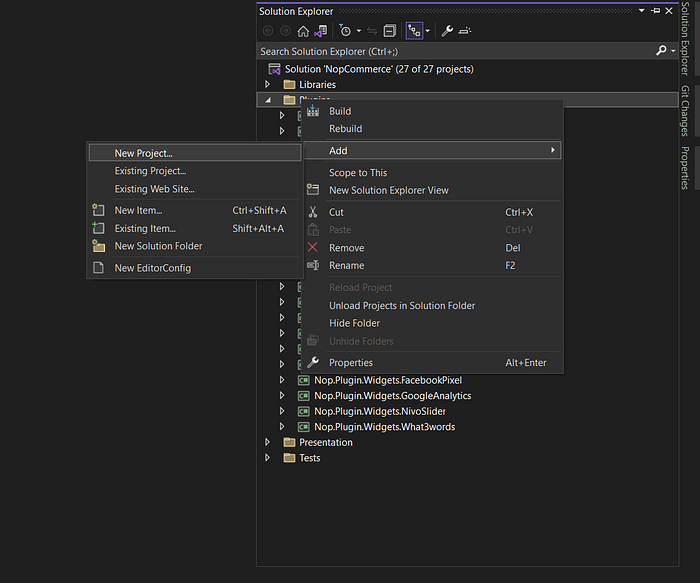
Navigate to the Solution Explorer in Visual Studio, right click on the Plugins folder, and proceed to Add > New Project.
Step 3
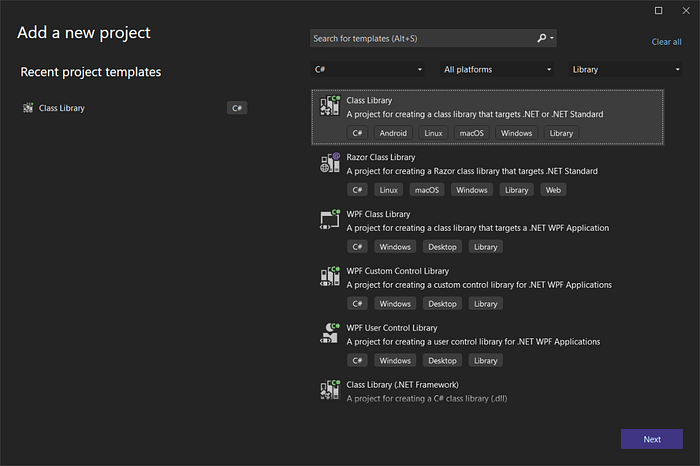
In the Add a new project window, choose Class Library project, then click Next.
Step 4
Assign a fitting name to your NopCommerce Plugin Project. For this example, we’ll employ Nop.Plugin.Misc.BasicPlugin.
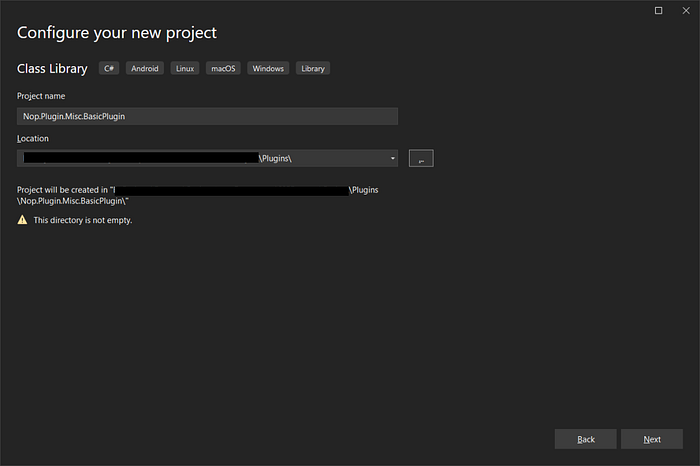
Note: The plugin project should be situated within the \Plugins directory in your nopCommerce project directory.
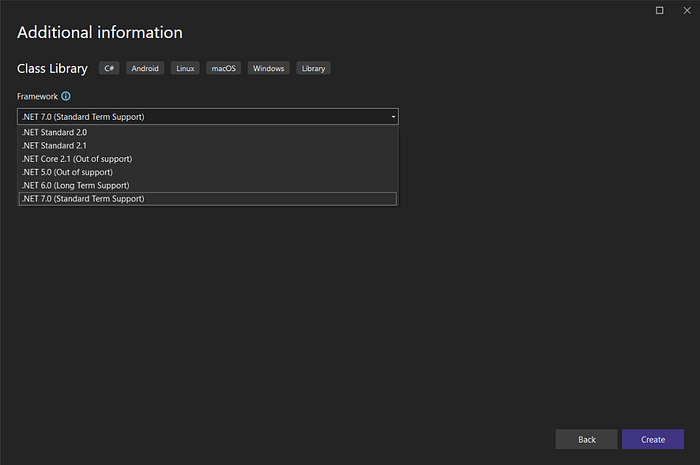
You need to select .Net 7.0 in the next window as shown in the image below and click on Create button to create the plugin project.
Step 5
Once done, you will be able to see the newly created plugin project in your nopCommerce solution under the Plugins folder.
Right click on the freshly created plugin project and select Edit project file. This will open the .csproj file of your plugin project to edit in the Visual Studio.
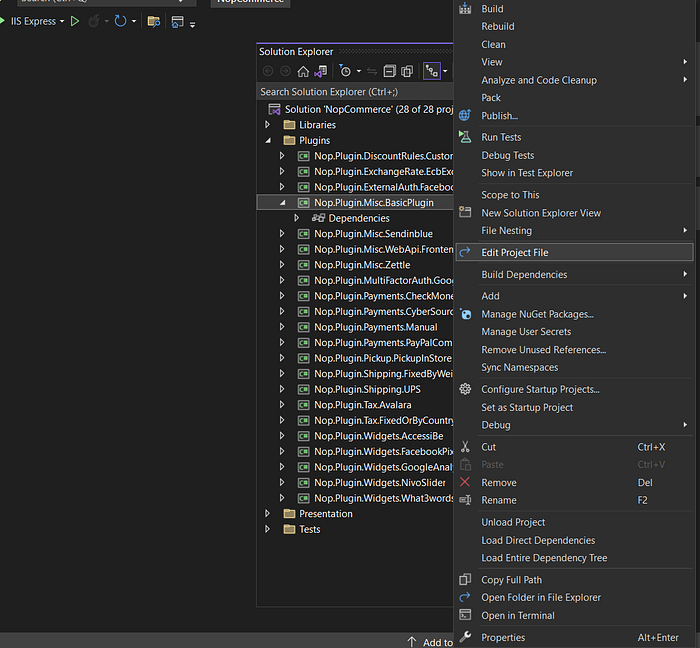
Step 6
In the plugin .csproj file, remove the properties ImplicitUsings and Nullable respectively from the PropertyGroup.

Configure the new properties OutputPath, OutDir, and CopyLocalLockFileAssemblies in the PropertyGroup.
<PropertyGroup>
   <TargetFramework>net7.0</TargetFramework>
   <OutputPath>..\..\Presentation\Nop.Web\Plugins\Misc.BasicPlugin</OutputPath>
   <OutDir>$(OutputPath)</OutDir>

   <!--Set this parameter to true to get the dlls copied from the NuGet cache to the output of your project.
    You need to set this parameter to true if your plugin has a nuget package
    to ensure that the dlls copied from the NuGet cache to the output of your project-->
   <CopyLocalLockFileAssemblies>false</CopyLocalLockFileAssemblies>
</PropertyGroup>
Add references to both Nop.Web.Framework and ClearPluginAssemblies projects under ItemGroup. Then add an after Build target which should execute ClearPluginAssemblies project after the plugin has been build successfully.
<ItemGroup>
  <ProjectReference Include="..\..\Presentation\Nop.Web.Framework\Nop.Web.Framework.csproj" />
  <ClearPluginAssemblies Include="$(MSBuildProjectDirectory)\..\..\Build\ClearPluginAssemblies.proj" />
</ItemGroup>

<!-- This target execute after "Build" target -->
<Target Name="NopTarget" AfterTargets="Build">
  <!-- Delete unnecessary libraries from plugins path -->
  <MSBuild Projects="@(ClearPluginAssemblies)" Properties="PluginPath=$(MSBuildProjectDirectory)\$(OutDir)" Targets="NopClear" />
</Target>
The project file should look like below image once modifications are done as shown.
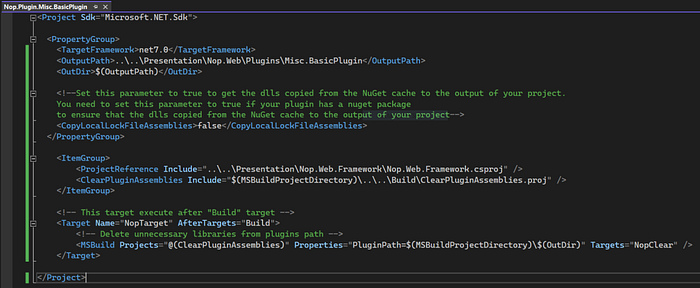
Note: Post nopCommerce version 4.10, there’s no need to add other projects separately as Nop.Web.Framework encompasses references to all other projects in the solution that are included by default with the nopCommerce project.
Step 7
Right click on your plugin project, proceed to Add > New item.

Name the new item as plugin.json.

Step 8
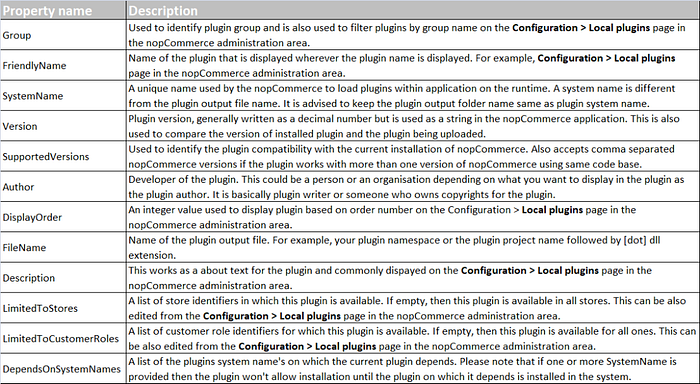
Open the newly incorporated plugin.json file to edit in the Visual Studio and specify JSON properties as shown below.

{
  "Group": "Misc",
  "FriendlyName": "BasicPlugin",
  "SystemName": "Misc.BasicPlugin",
  "Version": "1.00",
  "SupportedVersions": [ "4.60" ],
  "Author": "NopAdvance team",
  "DisplayOrder": 1,
  "FileName": "Nop.Plugin.Misc.BasicPlugin.dll",
  "Description": "This is a sample basic nopCommerce plugin"
}
A plugin.json file in nopCommerce plugin has all necessary information about the Plugin. Please look at the below table for more details.
Step 9
Right click on the newly added plugin.json file and proceed to properties.
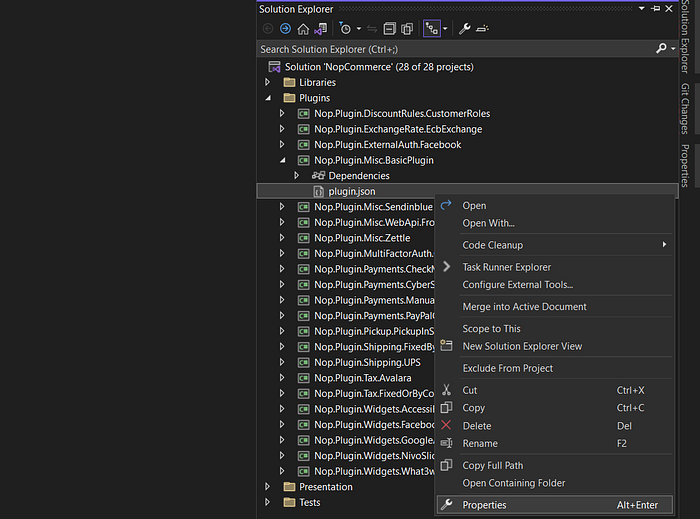
Step 10
Within the Visual Studio > properties for the plugin.json file, set Build Action to Content and Copy to Output Directory to Copy always.

Step 11
Right click on your plugin project and navigate to Add > Class. Name your class BasicPlugin.cs and click on Add button.

Your newly added class should resemble the image below.

Step 12
Next, make the class added in the previous step inherit from the BasePlugin class and implement the InstallAsync & UninstallAsync methods.

    internal class BasicPlugin : BasePlugin
    {
       public BasicPlugin() { }

        public override async Task InstallAsync()
        {
            await base.InstallAsync();
        }

        public override async Task UninstallAsync()
        {
            await base.UninstallAsync();
        }
    }
Step 13
Right click on your project and Build it.
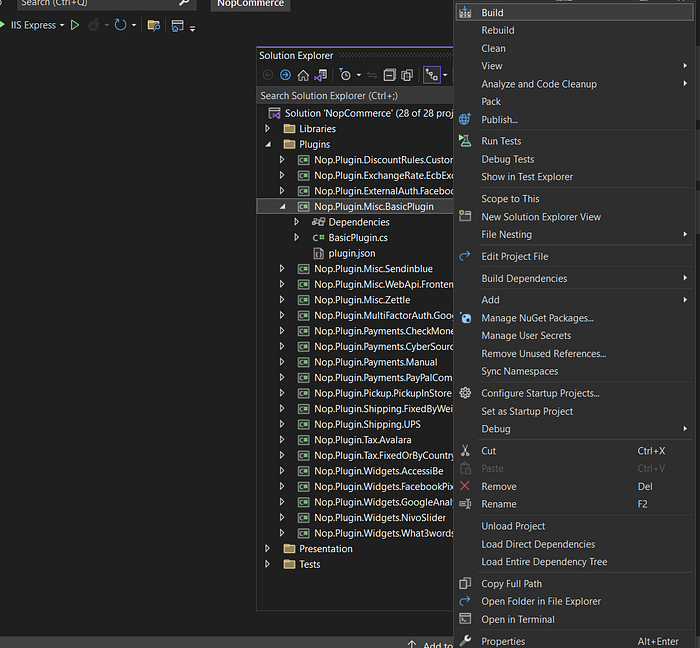
Wait until the build is successful.

Step 14
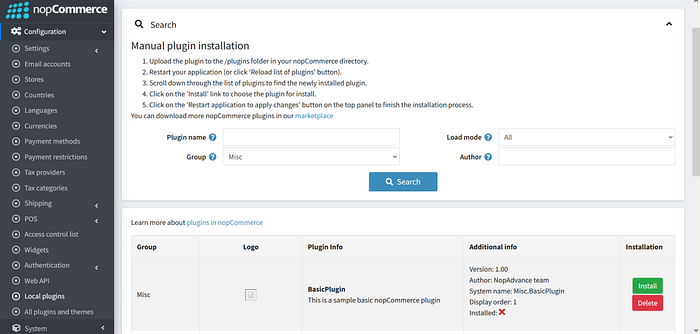
Run your project, log in to the admin area, then navigate to Configuration > Local plugins.
On the local plugins page, locate the newly created plugin.
Step 15
Once located, install the plugin you just crafted. After installing your plugin, you’ll notice buttons atop the local plugins page. Click on Restart application to apply changes to finalize your plugin installation.

Once you click on the Restart application to apply changes, the nopCommerce application will restart automatically.
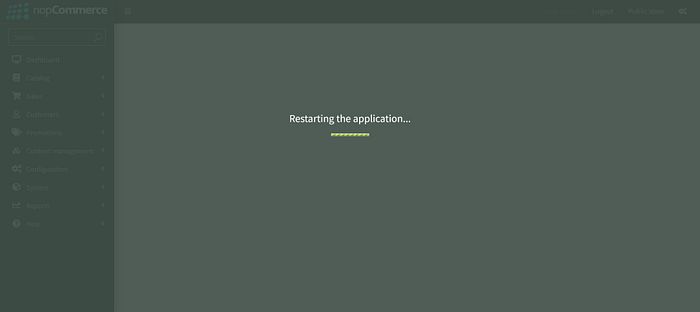
That’s it… The plugin is installed successfully!

Conclusion
With this newfound knowledge of crafting a plugin from scratch in nopCommerce 4.60, our forthcoming “Beginner’s guide” plugin articles will delve into the creation of different types of plugins in nopCommerce.
Stay tuned..
Writing a plugin is indeed beneficial when upgrading nopCommerce and is relatively less costly. However, when compared to direct customization in the nopCommerce source code, crafting a plugin may be more costly.


